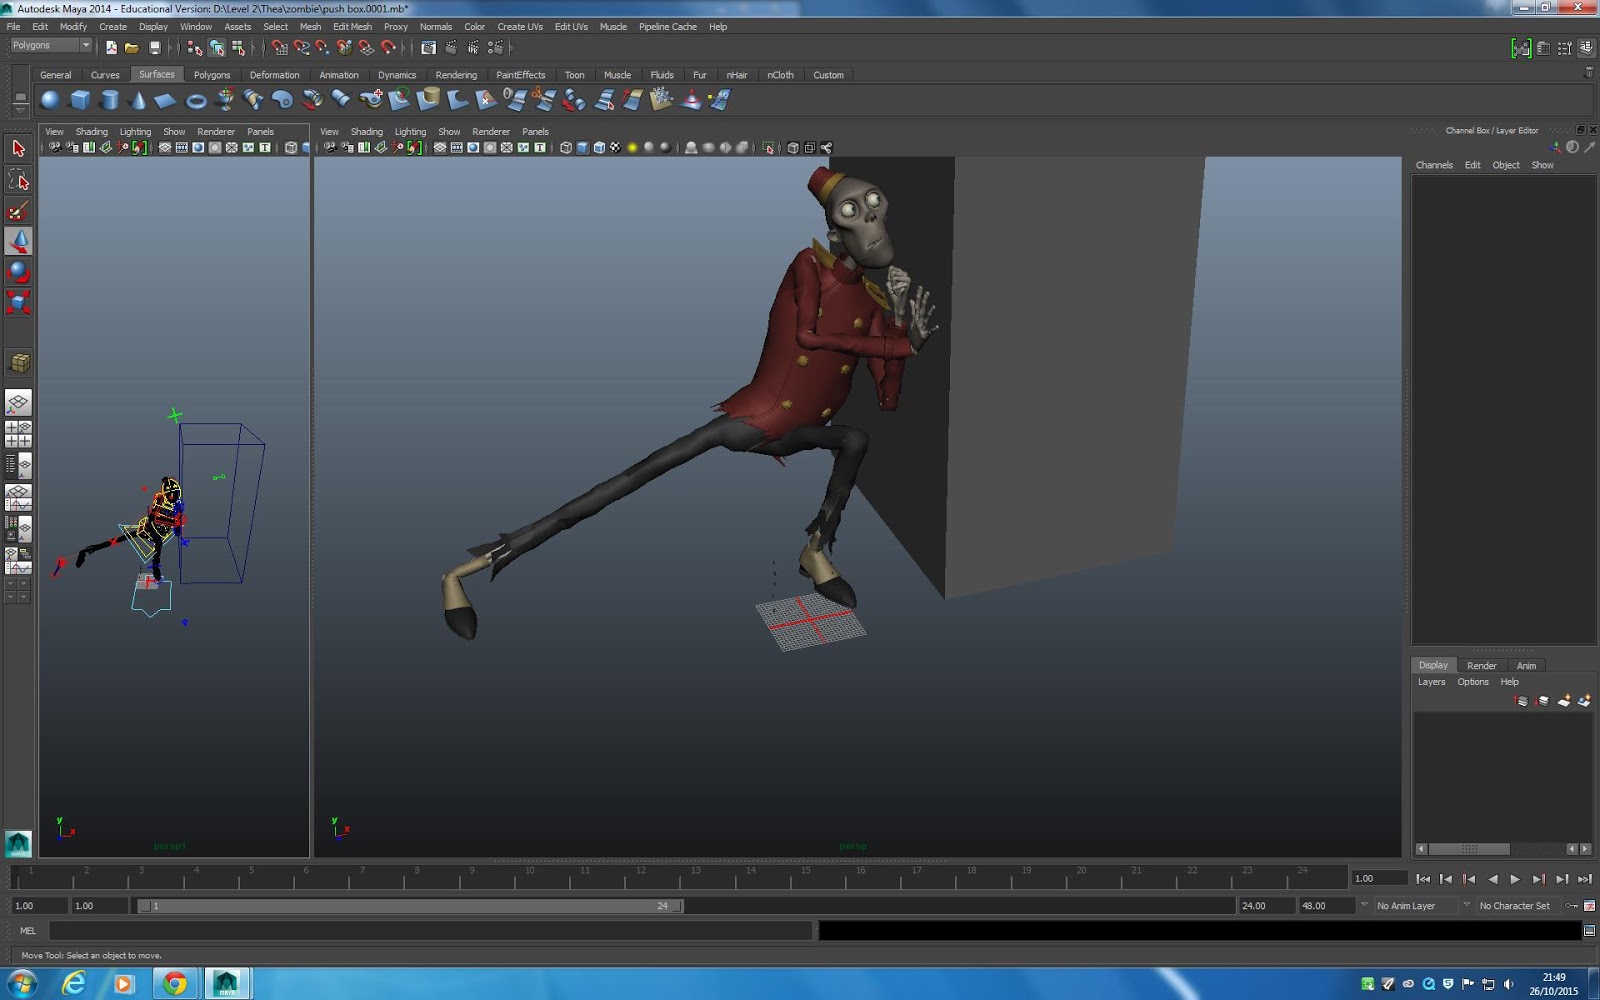
Pushing box
https://www.youtube.com/watch?v=3THJdo1sj0U
the Push is based on the profile view in the youtube movie of the guy pushing trolleys

the Push is based on the profile view in the youtube movie of the guy pushing trolleys
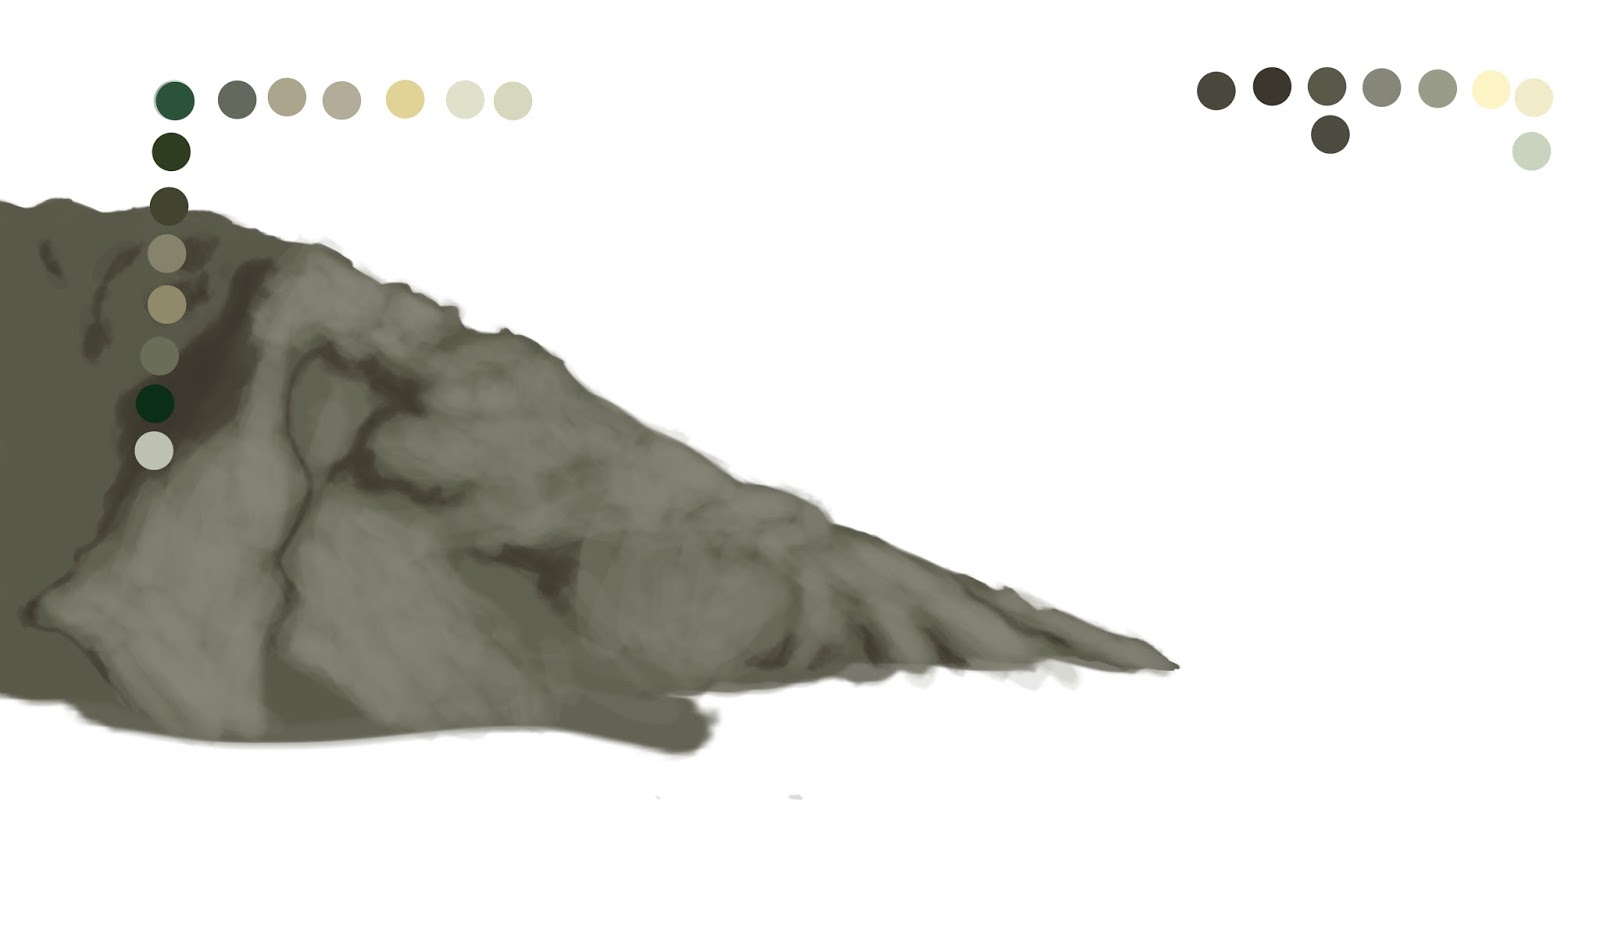
Testing out styles
I'm trying to fake my way to a watercolour style with not much success. The main issue is that I'm not very good at combining colours and also that I'm more of a sketcher than a painter. The colours are taken from these two pictures.


Diorama
I ekspanded the idea a bit more by adding Norwegian fairy tales in it. the first layers is woods and you can see two layers in King Valemon (who moves slightly) when the camera quickly pans past before it goes zigzag trough the layers with a quick sideways glimpse at the witch in the stump.


from there you pan down to see nøkken floating in the water. moving the camera up again to eyesight, it keeps on going trough the mountains until it ends up at the last mountain which turns out to be a troll that opens its eyes.


King Valemon
witch. -Gjetekongens harer
from there you pan down to see nøkken floating in the water. moving the camera up again to eyesight, it keeps on going trough the mountains until it ends up at the last mountain which turns out to be a troll that opens its eyes.
nøkken
troll
I have to figure out the style cause the one I originally wanted clashes with the fairytale feel.
jumping 2D
the jump without the inbetweens. it looks a bit wrong so need to figure that out. it's based on this jump

Zombie
the point of this was to get to know the rig better and to work in IK and FK. so far I've only worked with the standard setting, i think it's FK. its the one where you control from the solder down.
The first pose is supposed to be sadness. one thing i found really hard with this rig is that you don't have that much facial expressions so you have to rely a lot on the body.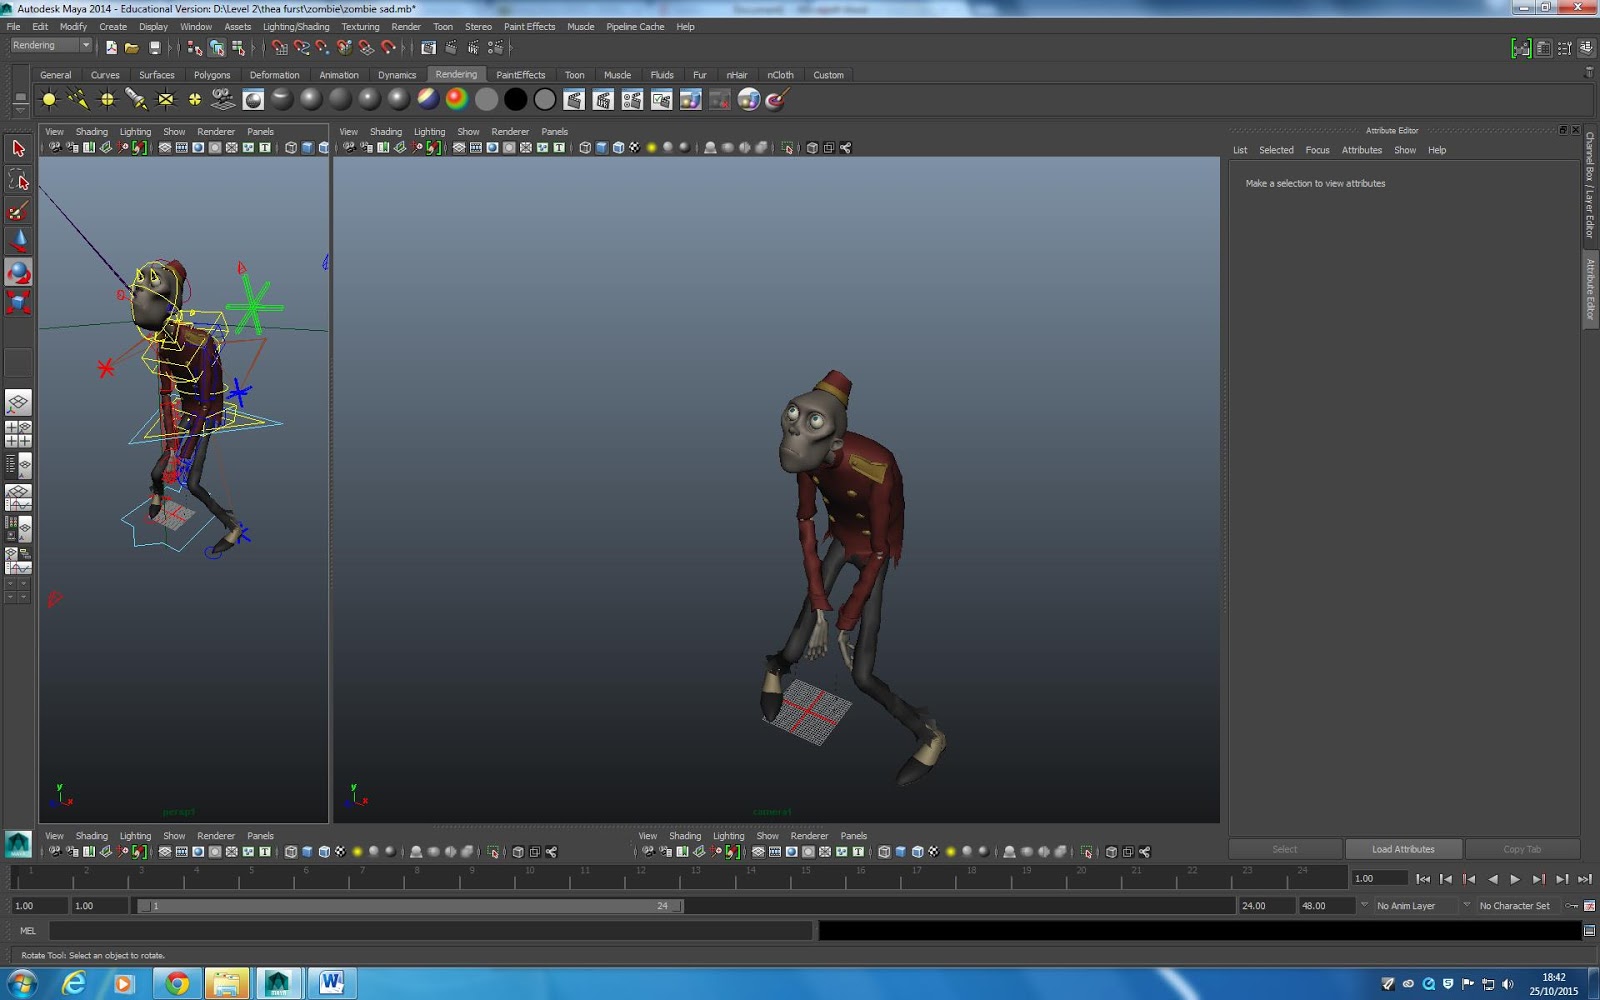
the next expression was disbelief. i wanted to do something slightly different then the first pose i thought of. I did the pose then started with the details. when i was happy with the hand I saw that the pose wasn't really in balance.


bouncing ball 3D

I made the bouncing ball like we have learned in 2D with the time charts. I'm not sure I did everything in the right order tho. I started with placing the ball 1, 13, 25 before I made the other key frames. Once that was done I went in Graph Editor to fix the easing in and out maya does for you and this is what the graph looked like. 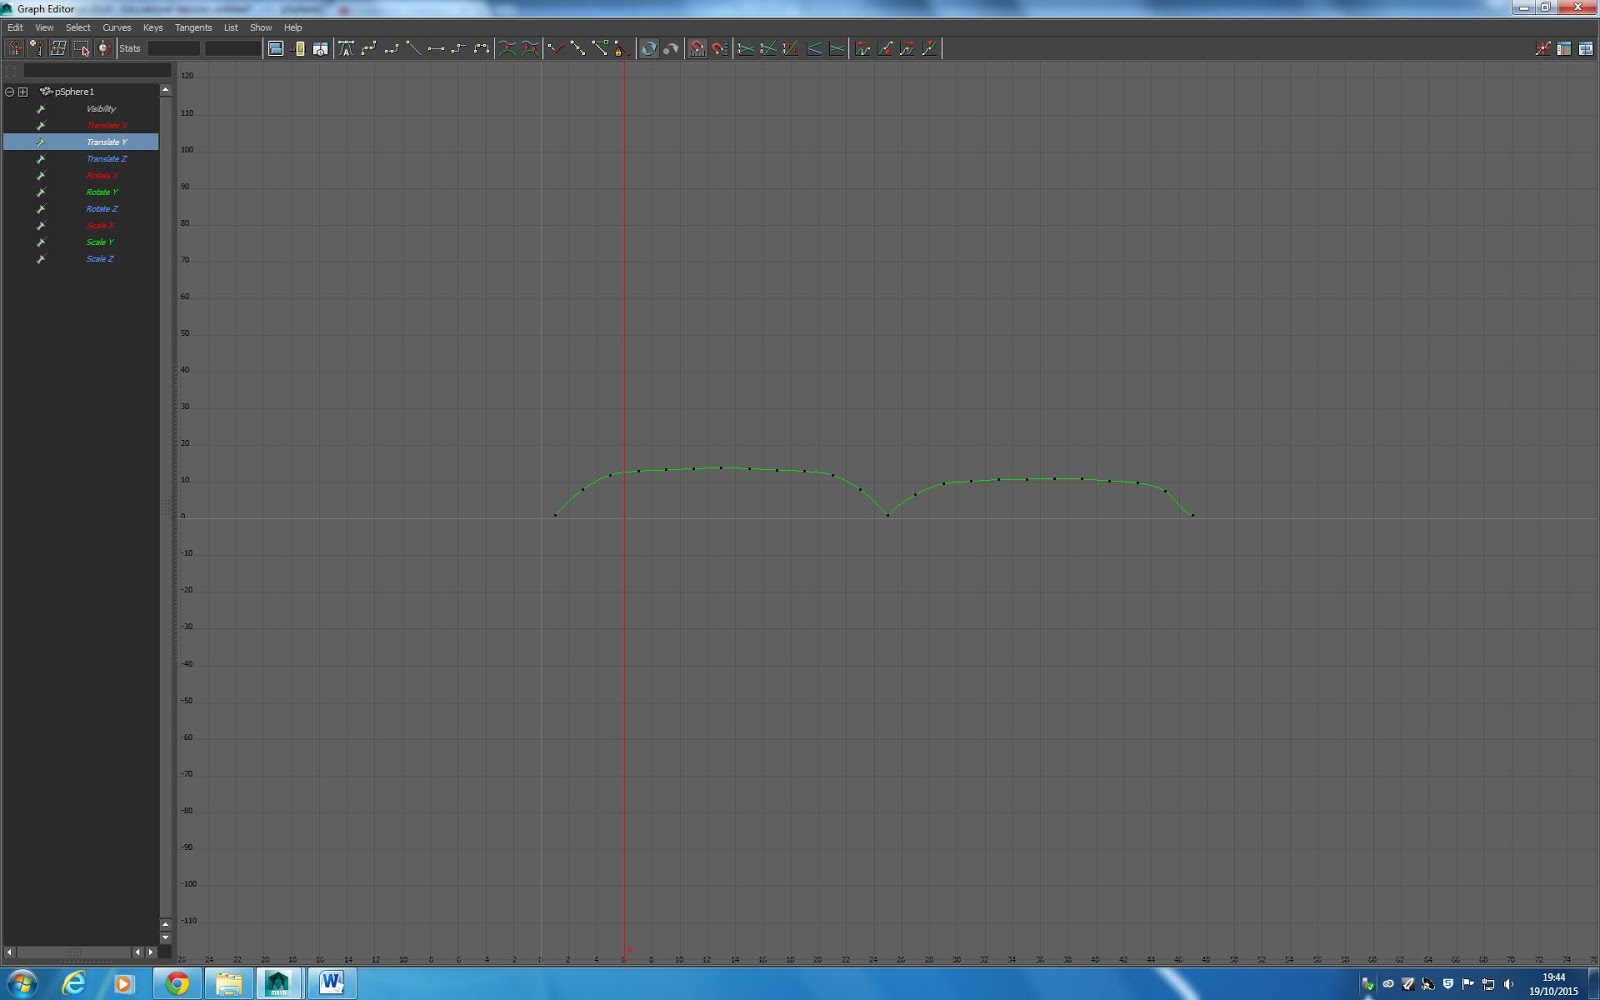 I'm not sure if that's what its supposed to look like but figured it was ok, at least the bounce looks ok. I made the tweaking on the graph and then I tried to find out how to export, but I don't know how to do that and during this search for how to do this I remembered that I forgot to set the project so I'm not even sure where the files are. you learn from your mistakes so hopefully it will open, but I have to make it again and go thoroughly trough the steps and not do it on auto bad habits.
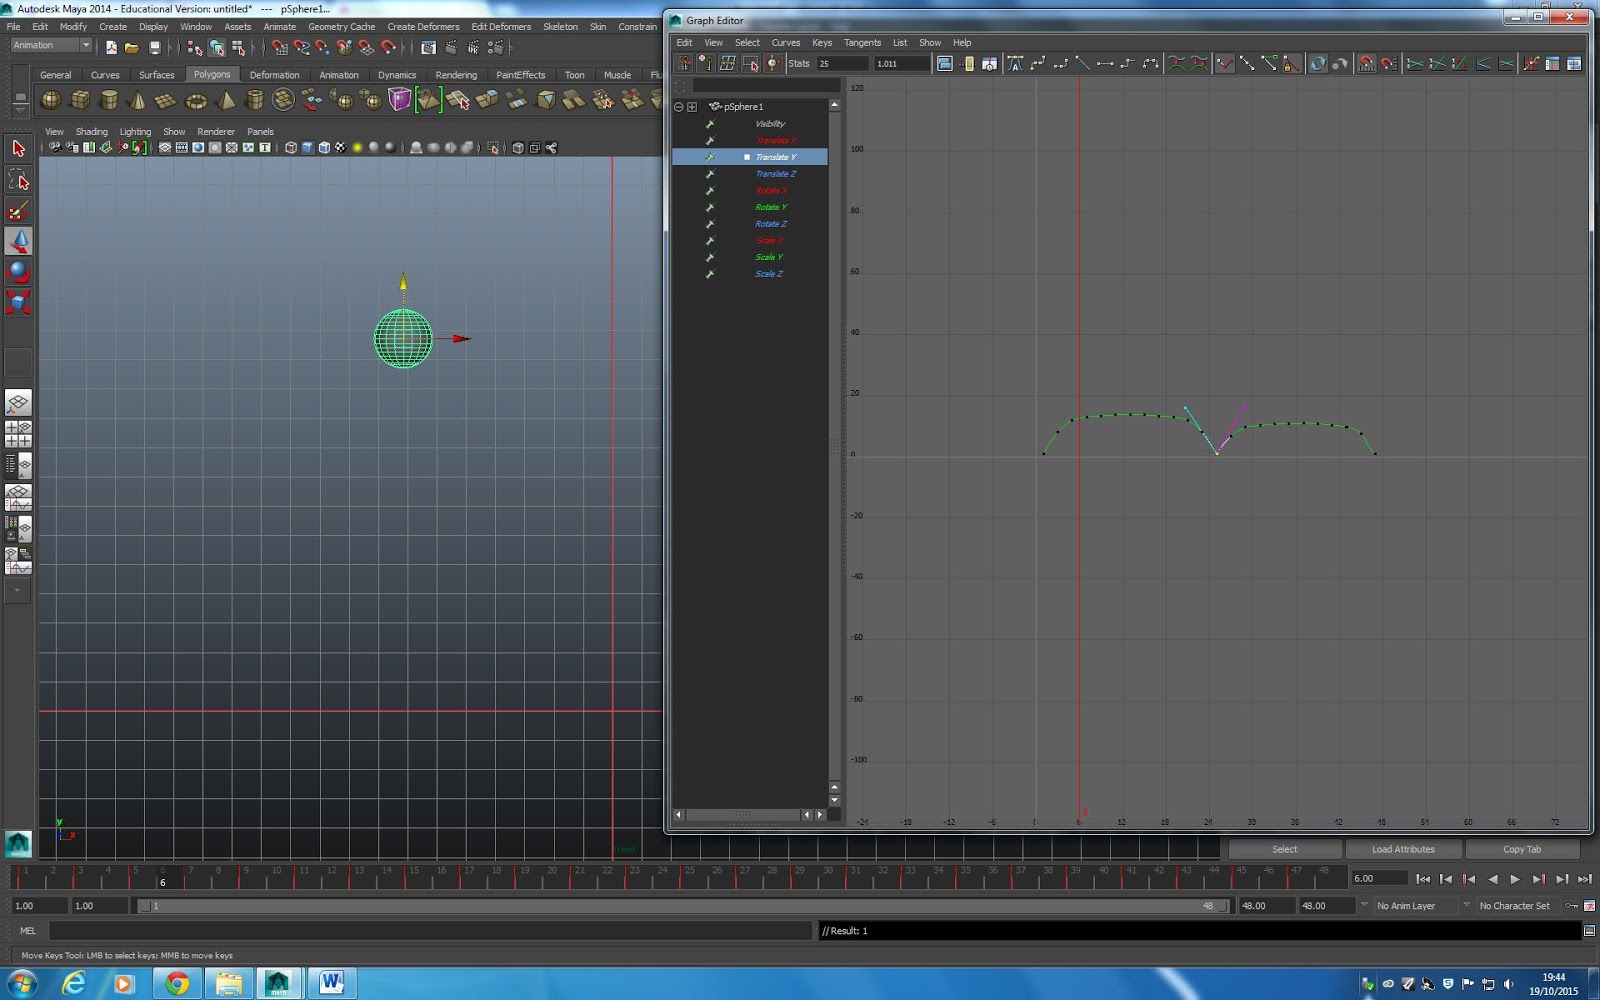
I'm not sure if that's what its supposed to look like but figured it was ok, at least the bounce looks ok. I made the tweaking on the graph and then I tried to find out how to export, but I don't know how to do that and during this search for how to do this I remembered that I forgot to set the project so I'm not even sure where the files are. you learn from your mistakes so hopefully it will open, but I have to make it again and go thoroughly trough the steps and not do it on auto bad habits. Modelling in Maya sugar pot


Then I used the edge loop tool on all the edges, first 4 to
make the thicker parts on the bottom and top then 2 for each so the edge would
be more defined.

Next I made the lid with the Curve tool.

I defined some of the details on the top in the same way as
before.

Next was the handle and the hinge but it was a bit too
complicated for me at this point so I took some artistic liberty and did not
make anything and just left it as a normal lid.


Modelling in Maya teapot
Modelling in Maya is going ok. Because I wasn't there the day you thought us
Maya I've been lacking behind but I hope I get that sorted out soon. I sent a
mail to Simon asking for a quick 101 so hopefully he'll have time and I'll be
at the same level as the rest of the second years next week. this week I got a
lot of help from Jeng and Wilde so at least I have something to show for
tomorrow.


This is the teapot I've made. As you probably can see there's a few mistakes I don't know how to fix at the bottom and around the edge of the tip, but hopefully it works well enough for what were gonna do on the Monday lesson.
I made the shape with the curve tool and used the edge loop tool to make the edges on the top a bit more defined.


The handle is made the way you showed us with the extrude and then a hole at the bottom where I connected the edges.

This is the teapot I've made. As you probably can see there's a few mistakes I don't know how to fix at the bottom and around the edge of the tip, but hopefully it works well enough for what were gonna do on the Monday lesson.
I made the shape with the curve tool and used the edge loop tool to make the edges on the top a bit more defined.
The handle is made the way you showed us with the extrude and then a hole at the bottom where I connected the edges.


how the Diorama works


After the lectures we had on light I got really inspired to try out light in this diorama. What my "vision" of this diorama is now is that it's going to be from a strong light sourse in the far background (Late day sun or early morning) peeking up from behind the Mountains.


